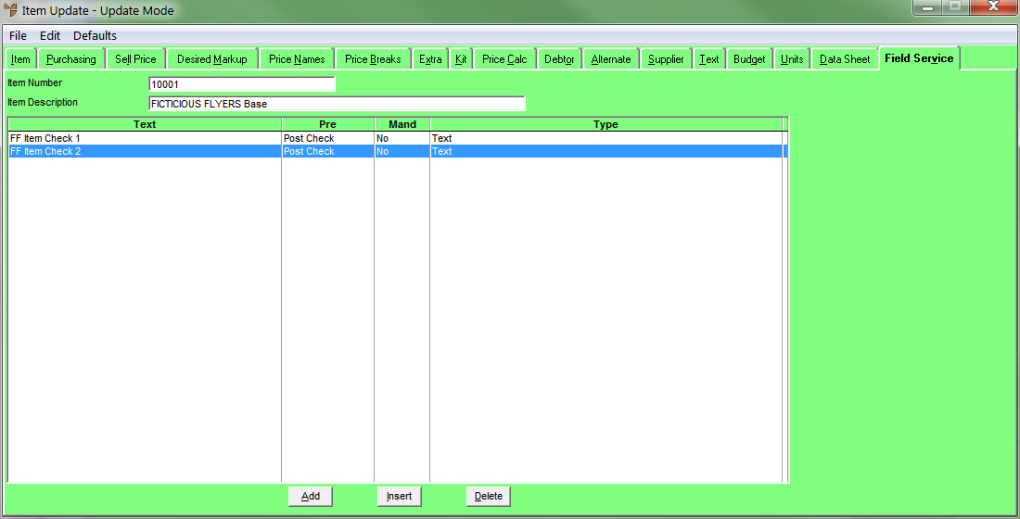
You are here: 1. Distribution System > 1.3. FILE Menu: Master File Maintenance > 1.3.1. File - Inventory > 1.3.1.23. File - Inventory - Field Service

File - Inventory - Field Service

The Item Update screen – Field Service tab is used by the Field Service module in the Micronet Job Costing System (MJC). You use it to setup post checks that are displayed to field service employees on their PDAs when they are processing jobs. These post checks will appear at the completion of jobs that include the selected item.

Item post checks are any questions relating to the selected item that field service employees need to answer when they have completed a job. For example, they might need to acknowledge that they have used and correctly disposed of the appropriate safety gear to handle a hazardous item.


Technical Tip

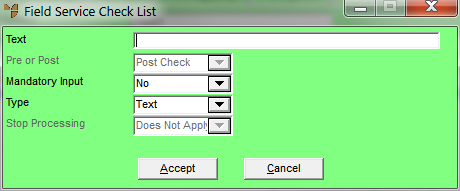
You cannot setup pre checks for items.

You can also setup pre and post checks that are displayed for all jobs (refer to "Edit - Applications - MJC - Field Service") or that are only displayed for specific:

To setup post checks that apply to a specific item:

  1. Add a new item or open an existing one.

Refer to "Adding a New Item" or "Updating an Item".

  1. Select the Field Service tab.

Micronet displays the Item Update screen - Field Service tab.

  1. If you want to:

If you selected to add, insert or edit a post check , Micronet displays the Field Service Check List screen.

  1. Complete the following fields:


Field

Value


Text

Enter the text that will be displayed on the PDA as the title of the pre or post check.


Pre or Post

This field is disabled as you can only create post checks for items.


Mandatory Input

Select Yes if the field service employee must enter data in the check to continue processing the job, or No if data entry is not mandatory.


Type

Select the type of data entry required by the check – Text, Numeric, Date, or Yes or No.


Stop Processing

If you selected Yes or No in the Type field, select whether the user’s answer to the check should stop processing of the job. Options are:

  • Does Not Apply – processing can continue regardless of the user’s answer
  • Stop on Yes – stop processing of the job if the user answers Yes
  • Stop on No – stop processing of the job if the user answers No.
  1. Select the Accept button.

If you selected to add a post check, Micronet redisplays the Field Service Check List screen so you can add further checks.

  1. When you have finished entering post checks, select the Cancel button.

Micronet redisplays the Item Update screen – Field Service tab showing all the post checks added.

  1. Select FILE | SAVE.